Startup your VSCode workspace on Linux
by Bill Jellesma2020-01-02 00:15:00

Like many that prefer the power, capability, and philosophy of Linux, I dual boot Windows and Linux on my home computer. Despite the uprising of gaming on linux thanks to platforms such as Steam, Windows is still king for playing video games. Windows is also good for exclusive Windows applications such as Visual Studio. Linux is great when I want to get in touch with my inner nerd and use the terminal like Elliot Alderson from Mr. Robot. For ease of switching back and worth between the operating systems, I have a projects folder setup in Documents on my windows partition. This way, if I'm using Windows with Visual Studio, I simply have the projects folder right there in my documents folder. If I'm using Linux, I simply mount my Windows partition and use a startup script to open my projects folder automatically.
How do you automatically mount the Windows partition in Linux?
I'm glad you asked. We'll be mounting the Windows partition automatically and open Visual Studio Code, the popular text editor by Microsoft that works on Windows, Mac, and Linux, on startup of our Linux operating system.
- Open
disksutility in Linux and find the partition that you want to auto mount.
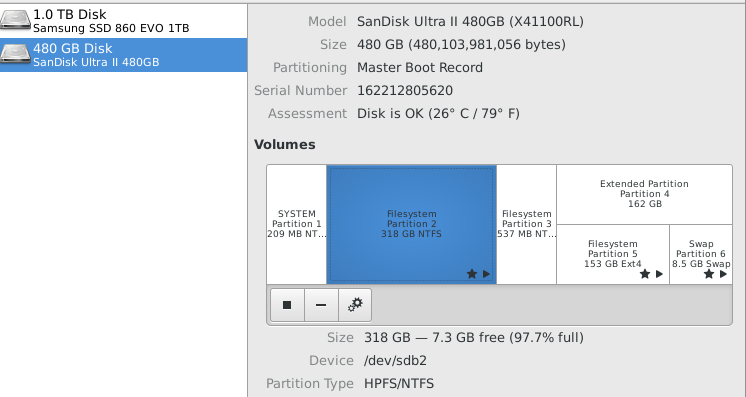
You can tell that the partition is Windows because the filesystem is NTFS (the file system used by Microsoft since Windows NT). In fact, assuming you don't already have multiple Windows partitions, it is the biggest NTFS filesystem partition. The two smaller NTFS partitions are the system (labeled System) and recovery partitions. This large Windows partition is where all of our files must be stored.
- Set the mount point to a familiar name
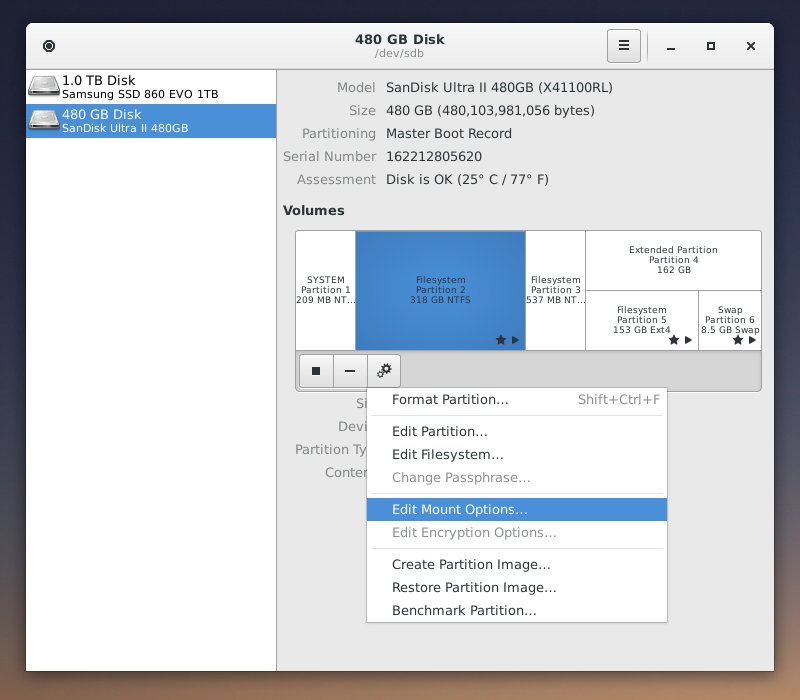
By default, the mount point of the partition will be some random UUID like above. We want to use a friendly name so that we don't need to use the random UUID in the terminal when we're navigating around. Focus the partition to mount with your mouse (click the partition), use the gear icon at the bottom and select edit mount options.

- Create a workspace within VSCode
Open the project folder in VSCode that you'd like to be opened by default. In VSCode, go to File -> Save As Workspace to save your workspace with a .code-workspace extension. VSCode will use this file extension to automatically load your project folder.
- Create a shell script to open the workspace with VSCode
#!/bin/bash

code /home/<username>/desktop/projects-workspace.code-workspace
<username> will be replaced with your username
The above assumes that I've saved the workspace in the desktop directory as projects-workspace.
- Make the shell script executable.
chmod 744 open-workspace.shFor this example, I've saved my shell script as open-workspace.sh and we need to make this file executable by the user. The chmod command is used as the command to create file permissions. chmod is an older command for permissions and the three digit code following refers to the permissions for the user, group, and other, respectively. The specifics of how to use this command can be found here. Many places online may advise you to use 777 for permissions as this is easy but it will give everyone permission to read, write, and execute the file. Instead, we'll be using 744 which will give you (the user) permission to read, write, and execute the file while give others only permission to read the file.
- Set Startup Application
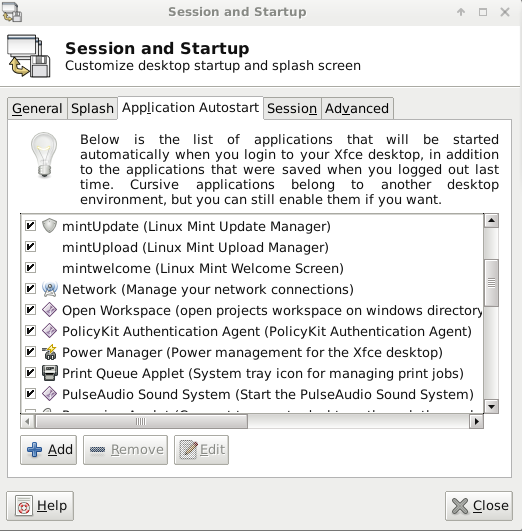
Go to the Session and Startup utility -> Application autostart tab and add an entry.
Enter a friendly name and description. Finally browse the location of the shell script for the command section.
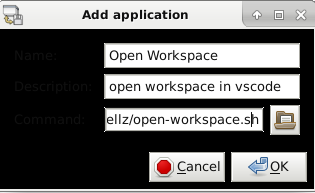
You should now see your startup command in the list of applications to autostart and can toggle the checkbox to turn on and off the application.