Intro to Docker
by Bill Jellesma2020-08-09 20:45:00
Intro
Containerization, specifically Docker, is an interesting beast. It is both complicated and simple, ugly in syntax yet beautiful in practice. Containerization is a practice that I just shrugged off as being too difficult and time consuming when it first showed up. Because when you're just playing around with side projects and you're the only one working on the project, why would you need it? I already have all of the dependencies on my machine. However, after working in the IT industry, I really see how it helps with the "It works on my machine" problem.

TL:DR
- Docker is the lightweight and developer friendly version of using virtual machines.
- Docker can automatically scale itself if it needs more resources.
- Docker solves the "it works on my machine" problem.
- I would leave Docker to packaging applications and still use my usual tools such as virtual environments for development.
- Dockerhub is a great way to test and evaluate applications.
Virtual Machine Analogy
In the IT industry, you quickly find how important virtual machines, or VMs, are. Let's say that, up until now, you've been working with a third party contractor to develop a portal for employees. Up until now, that contractor's been writing all of their code on a Windows 10 machine but now, they're ready to deploy that code to the masses. Well, up until now, you've also had no more that a handful of people that connect to the Windows 10 machine; you'll now have all of the employees connecting to the machine. If you can put that app onto a Windows Server machine, that would be a lot more scalable and be able to handle several connections very easily. However, buying a server is costly so, instead, you can spin up a VM on another server and then just allocate some resources to the server. What's more is that if you find out that the resources you allocated weren't enough, you simply take down the VM, allocate more resources, and spin up the VM again. You can take snapshots of the VM so that, if the physical server crashes later on for some reason, like somebody spills hot coffee on the server (I didn't see a sign saying I couldn't), you can use that snapshot and restore the VM to another server. These two main advantages, portability and scaling, are two main advantages that we can also find in containerization.
What Containerization can do for you
Containerization is very similar to virtual machines in that it has solutions for portability and scaling. However, I like to think of VMs as more of an IT Admin's solution and containerization as more of a developer's solution. They have different architectures.
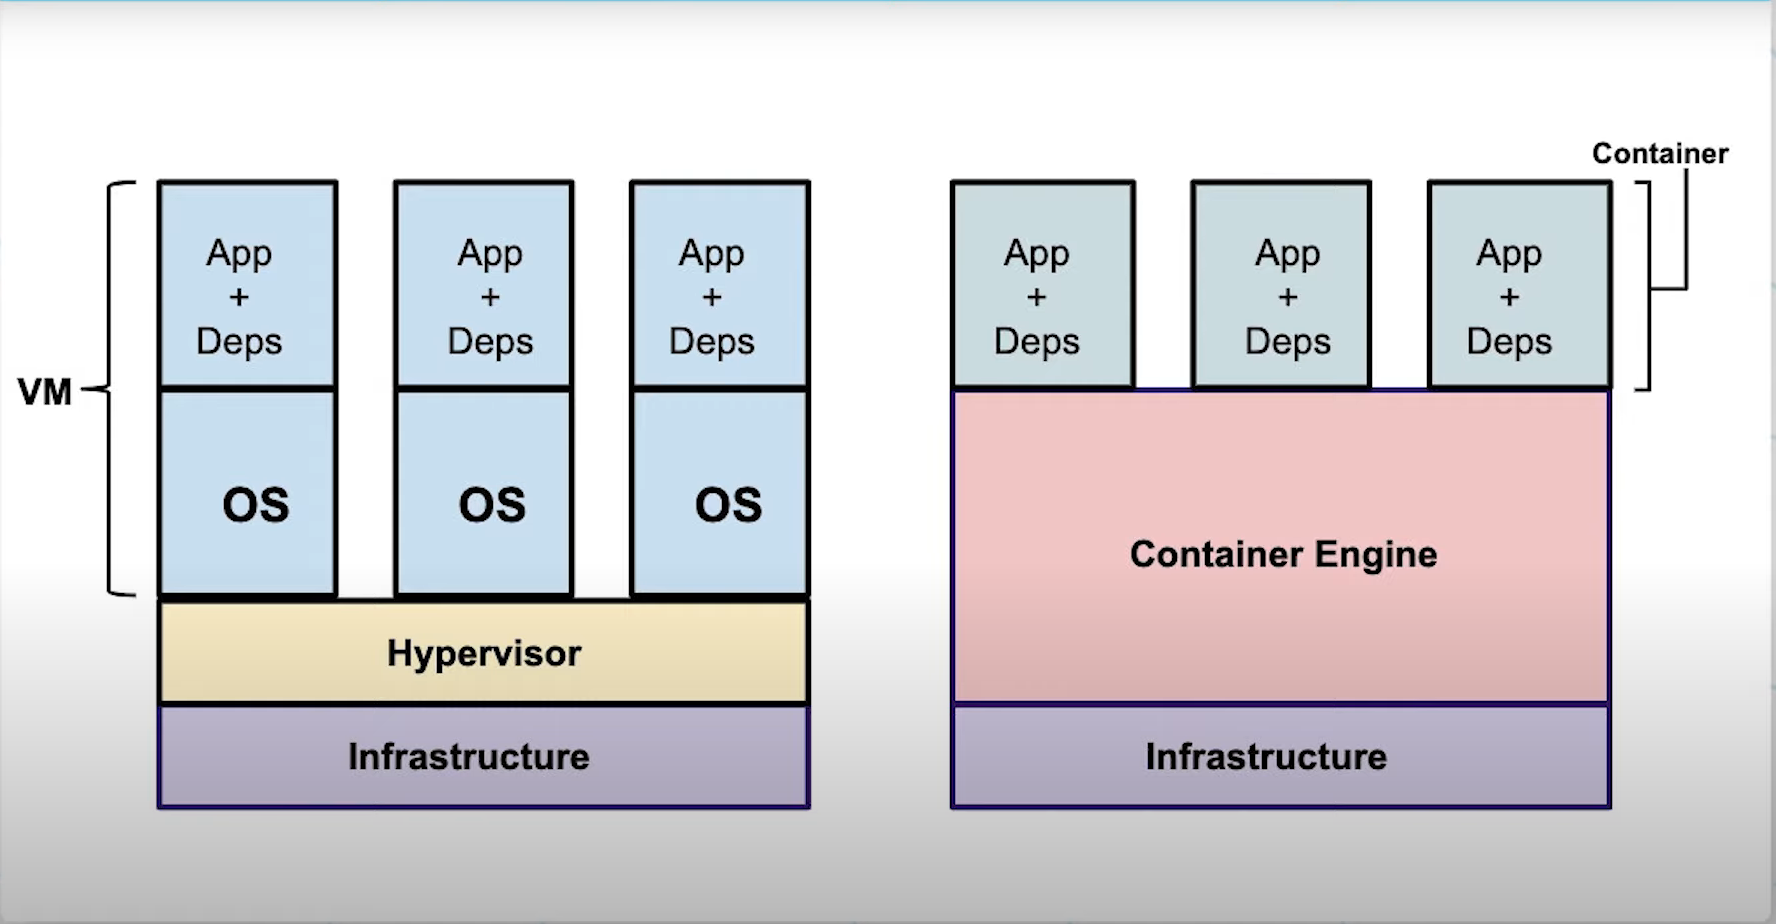
As you can see VMs are a little more heavyweight as they have a separate OS that sit of top of a hypervisor, the controller of the VMs; conversely, containers are more lightweight because they're just the app and dependencies that sit on top of a container engine that will automatically allocated necessary resources from the Windows or Linux OS that it sits on. Because they are more lightweight, containers are also faster to spin up than a VM. VMs and containers both offer a secure sandbox environment for you but, because of the scope of these two technologies, VMs offer an OS that is partitioned from the host OS by the hypervisor whereas containers offer an application that is partitioned from the OS by the container engine. Just as VMs can take snapshots which can be ported to run on different servers, containers are ephemeral packages that can be ported as a whole environment to a different machine. Other developers looking at the project can download the container image, the small portable dockerfile/instruction for the application, and use that to build the container on their machine. Since the container engine will work to allocate the resources to run that application separately from the environment on that developer's computer, this eliminates the problem of "it works on my machine". Furthermore, since the container engine automatically allocates resources, we don't need to bring down the container and manually allocate resources like we do with VMs
| Virtual Machines | Containers |
|---|---|
| Scalable. Need to manually allocate resources | Scalable. Automatically allocates resources. |
| Portable | Portable |
| Heavier (GB) | Lightweight (MB) |
| Slower to spin up and reallocate resources involved taking the VM offline | Faster to build and reallocation is done without taking the container down. |
| Storage is persistent in a VHD file | Storage is ephemeral but can be persistent if you add a volume |
In Summary, both of these technologies are still very useful in their own circumstances. VMs are useful if you need an entire operating system to practice on or install a bunch of apps on. Containers are useful if you need to just run an app on your computer.
A quick example with Docker
Seeing the advantages of Docker, let's dive into a quick example to solidify things. Let's start a new project called "hello_flask" where we'll simply have a page with a simple statement.
- Create a new project folder called
hello-flask - Create a file called
app.py app.pywill initiate a simply initiate a flask application, create one endpoint that returns a string, and runs the app locally on port 8080
from flask import Flask
APP = Flask(__name__)


@APP.route('/')
def hello_world():
    return "Hello flask, it's me Bill!"


if __name__ == '__main__':
    APP.run(host='0.0.0.0', port=8080, debug=True)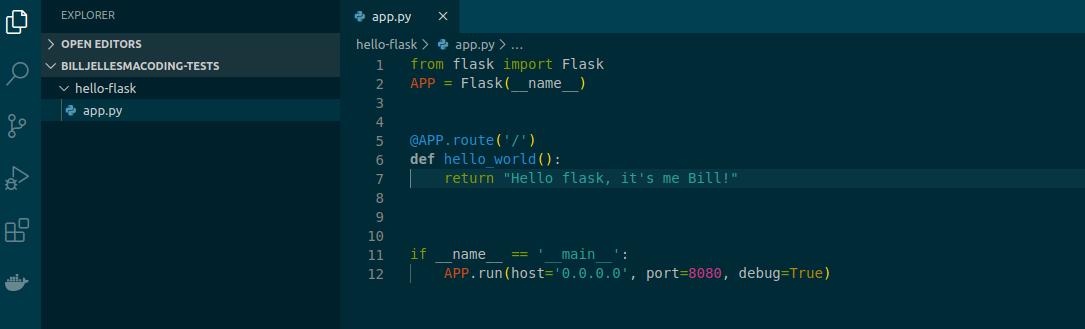
Optionally, I like creating a virtual environment that will keep the resources separate on my own machine while developing. I have another blog post explaining virtual environments and pipenv more here
- Open the terminal on the project folder and type
pip install pipenvif you don't already have this virtual environment. - With pipenv installed, type
pipenv installto install the virtual environment. - You should now have a
Pipenvfile in your project folder
- Open the terminal on the project folder and type
If you've just installed a virtual environment or don't have flask installed, type
pipenv install flaskinto your terminal.Create a dockerfile. These are the instructions that you can use to create a docker image that others can download. In this dockerfile, we'll be taking the following actions
- Defining a base image that we'll use to install python
FROM python:3.7.2-slim - Copy everything from the current directory of the image to the
/appof the container and set/appas the working directory withCOPY . /appandWORKDIR /app - Assuming that we're using pipenv as a virtual environment, we'll use
RUN pip install pipenvto install pipenv andRUN pipenv install flaskto install flask. If we're not using a virtual environment, we can simply useRUN pip install flask - We'll specify the command to run the application with
ENTRYPOINT ["pipenv", "run", "python", "app.py"]. The previous command again assumes that we're running pipenv. If we're not using a virtual environment, we can simply useENTRYPOINT ["python", "app.py"]
- Defining a base image that we'll use to install python
FROM python:3.7.2-slim

COPY . /app
WORKDIR /app

RUN pip install pipenv
RUN pipenv install flask


ENTRYPOINT ["pipenv", "run", "python", "app.py"]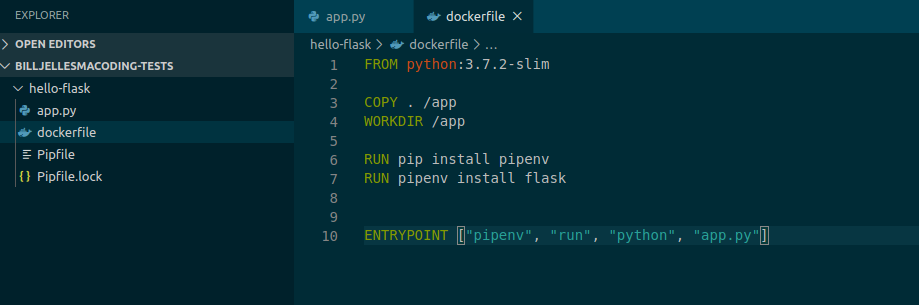
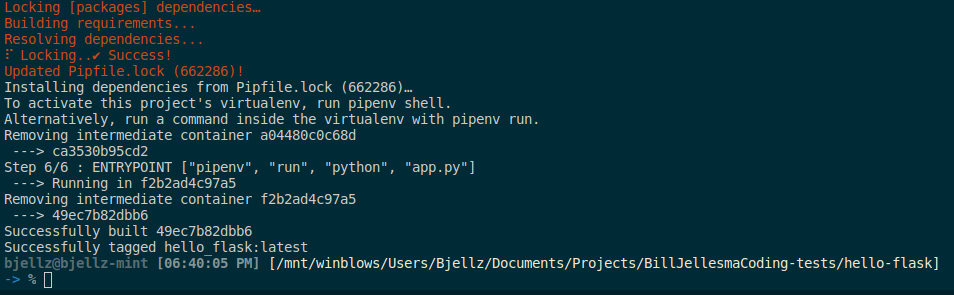
- We can now build the image with
docker build --tag hello-flask .- We're including
--tag hello_flaskas this gives a friendly name to the container to easily identify this in the future. - Don't forget the period
.at the end of this statement which tells docker to use the current working directory. I know personally that I've missed this before :)
- We're including
- We can check the image that we've just created with
docker image lsto list all of the images on our local repository (local machine)

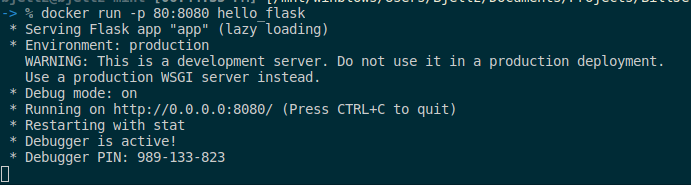
- We will run the image with
docker run -p 80:8080 hello_flask- Here we've also using
-p 80:8080to map port 80 on the host machine to port 8080 of the docker container.
- Here we've also using
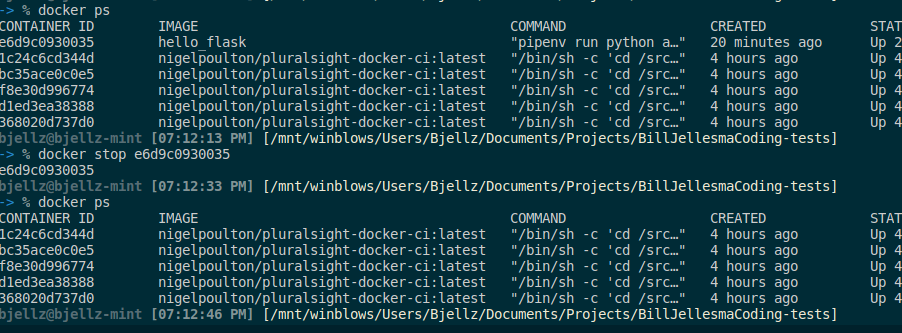
- We can check that this container is running with
docker ps

- We can also point our web browser to http://127.0.0.1:80

- We can stop this container by using the container id that we find with
docker psand usedocker stop <id>.
- We can restart the container by using the
docker runcommand again.
Note Any changes that we want to make to the source code will require us to to rebuild the container again with docker build
- To give this code to another developer, simply give them this working directory, whether you manually give them this directory using a usb thumbdrive or use a source code repository such as Github. They will need to have docker installed on their machine as well. Using docker, they will be able to build the image and run the container themselves.
Development without Docker
Docker has really shown its light with packaging applications to a staging environment or if you're shipping off an application that doesn't require being changed. However, if you're still in the begining stages of writing the code for the application, you'll need to rebuild the docker image each time that you need to rewrite part of the application and rebuilding the docker container can be time consuming. This is why, when developing the application, I would not use docker but use Flask debug mode for hot reloading.
In my process, I would use docker when it's time to ship my app to a staging environment or if I need to send the app to someone else like if I have a bug. For this reason, I would end up setting up a script in package.json to create and execute a docker container. You can read more about using package.json files to automate scripts in a blog post I've written titled Using NPM scripts to make an easy workflow
{
  "name": "hello-flask",
  "version": "1.0.0",
  "description": "",
  "main": "index.js",
  "scripts": {
    "server": "pipenv run python app.py",
    "docker-build": "docker build --tag 'hello-flask' .",
    "docker-run": "docker run -p 80:8080 hello-flask",
    "docker": "npm run docker-build && npm run docker-run"
  },
  "keywords": [],
  "author": "",
  "license": "ISC"
}
Testing an app using dockerhub
Earlier, we referred to your local machine being a local repository of images, there are also remote repositories of properly vetted images that you can use to test out new software. The most popular of these repositories is Dockerhub. Let's say that we want to test out using a PostGresQL database to figure out if it's a good fit for the application that we're building
Use the
docker pullcommand to pull an image to your repository. This command will first look locally to see if it's already available and then go to dockerhub, or another repo that you specify in their documentation. Use the commanddocker pull postgres:latestas instructed on the repo page. The:latestwill mean that you want to pull the latest version of the image.We will name this image
psqland will include the environmental variable ofPOSTGRES_PASSWORD, map 5435 on our machine to 5432 (the default port of postgresql), and use-dto run this in detached mode in the background. Altogether, we will use the commanddocker run --name psql -e POSTGRES_PASSWORD=password! -p 5435:5432 -d postgres:latestWe can now use the typical psql commands to connect to the database
psql -h 0.0.0.0 -p 5435 -U postgres- We will also be prompted for the password which is the same as the
POSTGRES_PASSWORDwe entered in step 2.
- We will also be prompted for the password which is the same as the
You can now use a connection string to connect to this database as you normally would. With this, we can take this database for a test run to see if it suits the new app that we're building
Conclusion
Docker is great for packaging applications in a portable and scalable manner, and it's also great for testing applications. Though, I'd still stick with my usual tools such as pipenv to develop applications, docker is a great way to ship the app to different environments for staging/testing. It also helps the "it works on my machine" problem, you can now respond with "it's docker, Jason, it works on all machines".