Scully
by Bill Jellesma2021-03-07 20:45:00

Let's talk about static site generators (SSG). I've been using Gatsby for years which is built on React. However, lately I've become really interested in using Angular. Naturally, I wanted to find an SSG that used Angular. I came to find that Angular had been neglected in the SSG world for a long time. A few months ago, I came across one startup SSG called Scully.
TL;DR
Pro
- Working with Angular, my preferred frontend.
- Faster development
Cons
- Need to use a production build of Angular each time you change the angular code
- Adds time for debugging since you'll have one process to build the app and one for the blogging component
- Still not as popular as Gatsby or Jekyll
QuickStart
Scully works on an existing Angular project so the first thing that you'll want to do is create a new project with ng new scully-test. Make sure that you set up routing with the project. If you don't setup routing with the project or if this is an existing project without routing, you can read how to add it with my post on Angular Concepts. Within the new project, use ng add @scullyio/init to add all of the necessary components for scully. Notice that a new scully folder will be created in your project.
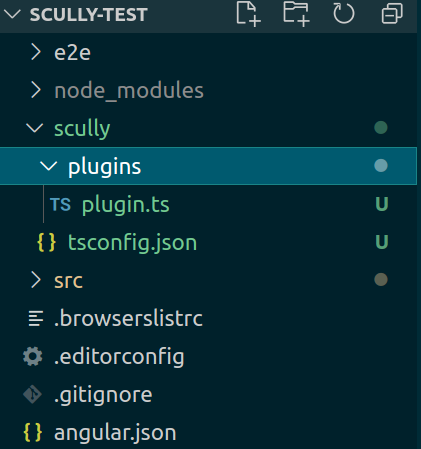
Run ng generate @scullyio/init:blog to add blogging functionality to your project. This command will create a blog directory in your src/app folder that will house all of the behind the scenes components and modules for your blog. Another blog directory is also created in the root of your project that will house your markdown file.
Next, use the following markdown code to create a test file. This test.md will be placed in the /blog folder. Notice that the frontmatter includes a published attribute which scully will use to figure out if the post is ready to be public.
---
title: 'Test Blog Post'
author: 'Bill Jellesma'
published: true
---

This is a test
We'll want to edit the scully.scully-test.config.ts to be able to use this blog folder. The file will be named according to what you named the project so if you name your project foo, the file will be scully.foo.config.ts.
import { ScullyConfig } from '@scullyio/scully';
export const config: ScullyConfig = {
  projectRoot: "./src",
  projectName: "scully-test",
  outDir: './dist/static',
  routes: {
    '/blog/:slug': {
      type: 'contentFolder',
      slug: {
        folder: "./blog"
      }
    },
  }
};
Create the following npm scripts in your package.json to make building and running easier.
"scripts": {
    ...
    "scully": "scully",
    "scully:serve": "npx scully serve --",
    "scully:watch": "npm run scully -- --watch"
  },
In order to navigate to your blog post. Modify app-routing.module.ts to add the blog route.
import { NgModule } from '@angular/core';
import { Routes, RouterModule } from '@angular/router';

const routes: Routes = [
  { path: 'blog', loadChildren: () => import('./blog/blog.module').then(m => m.BlogModule) }
];

@NgModule({
  imports: [RouterModule.forRoot(routes)],
  exports: [RouterModule]
})
export class AppRoutingModule { }
Generate a home component that we'll use to discover all of the scully routes with ng g c home and use the following code in the generated home.component.ts.
import { Component, OnInit } from '@angular/core';
import { ScullyRoutesService, ScullyRoute } from '@scullyio/ng-lib';
import { Observable } from 'rxjs';

@Component({
  selector: 'app-home',
  templateUrl: './home.component.html',
  styleUrls: ['./home.component.css']
})
export class HomeComponent implements OnInit {
  links$: Observable<ScullyRoute[]> = this.scully.available$;

  constructor(private scully: ScullyRoutesService) {}

  ngOnInit() {
    // debug current pages
    this.links$.subscribe((links) => {
      console.log(links);
    });
  }
}
Edit the home.component.html page to be the following.
{ path: '', redirectTo: '/home', pathMatch: 'full'},
To build and run your project, use ng build --prod --watch and npm run scully:watch. NOTE: In order for scully:watch to take effect, a rebuild must be triggered. To do this, simply edit one of your markdown files. Tip I've found it easiest to use one terminal running ng build --prod --watch and another terminal with npm run scully:watch so that whenever you make a change to the Angular structure, it is automatically built. If I need to use the angular CLI to make a component/module, I can simply open a third terminal to use those commands.
NOTE Make sure to run ng build --prod --watch 1st and then npm run scully:watch.
Finally, you should be able to navigate to localhost:1668 in the browser and see the following.
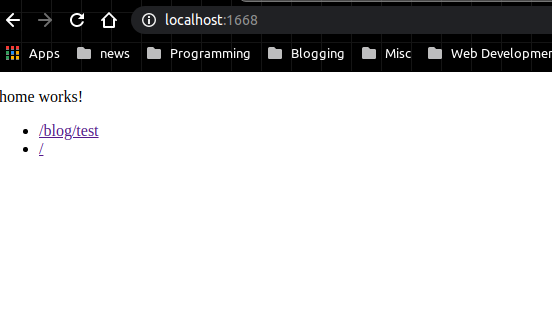
If you click the first blog link, it'll bring you to the test blog post that we created.
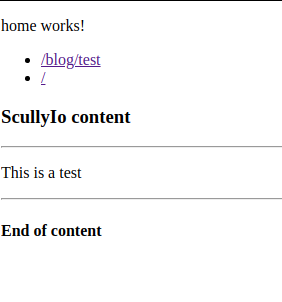
We're now off to the races and can begin creating blog posts!