Custom Odoo Modules: Inheritance
by Bill Jellesma2022-06-06 23:00:00

In a previous post, I've showed how to Install odoo. What I want to do in this post is to give a brief overview of creating a custom module. Though you can create a module to make a completely custom module (like a new app tile that will appear on the screen), I'm going to do a module which extends functionality of an existing module. Specifically, we're going to take a look at the purchase.order module and simply create a new field.
Why we're going to look at using python code
It's certainly possible to create a field in studio and even adding it a view, but this poses a few disadvantages.
- This customization exists in the
studio customizationsapp. If you were to uninstall this app for whatever reason, all customizations would disappear. - It's not a portable solution. You don't have the hard code to back this customization up. If you needed to create a new database or you wanted to open source this customization on github, the code for this wouldn't exist and because either you or an open source member is using a different database, the customization will disappear.
- The customization is assigned a random xml id. This means that if there were any other customizations to reference this customization, you would be forced to use this random xml id to reference this new customization. For example, lets say that someone wants to quickly add a field to a model and they add it through studio. If you or some other contributor wants to build off your new customization with their own customization that they'll make with code, they'll need to use the randomly assigned xml id in the code. This presents a new issue because if your team decides to move to a new database, not only will the studio customization break, the coded customization will also break because the xml id will also no longer exist.
Disadvantages aside, studio does pose advantages such as it being faster to implement, not have the barrier of needing to be familiar with code, or not having access to code on the server. Studio is fantastic to mock a new feature. For example, a design team could use studio to mock a new feature and send it to developers to build it. This is sort of like a designer building a mock web page/site in some wire framing tool like figma and then sending it to a web developer to build the functionality. The difference is that if you build a webpage in figma, it absolutely won't magically add the page to the website whereas if you build a new field with studio, it will immediately start to work in odoo. Therefore, the temptation is a lot higher to just stick with studio.
Rant over.
Overview of the App
This is going to be a simple app to just add one new field. Here's the requirement:
A lot of our vendors are from a beet farm and will only accept payment if they know the conversion rate to schrute bucks. Therefore, we need to add a field on our purchase form for the purchaser to provide the value in schrute bucks. This field will be required to be on every purchase order. If the field is not entered on the purchase order, we'll be pelted with beets. Ouch.
The above is a pretty good requirement that our requesters have made and give us a clear idea of what we need. Here's a quick breakdown of some technical requirements we can glean from the above request.
- Because they want to add a field to an existing form, we'll use inheritance rather than create a new app.
- Because the user will always provide the schrute bucks value, we don't need to compute anything
- This field will be required to be on every purchase order so that's really the only attribute.
- The form that the user is looking to modify uses the
purchase.ordermodel. We can find this by viewing the url of the odoo page that the user is on. It'll typically read something like the following. Notice themodel=purchase.orderpart. This lets us know that the field we create needs to be added to this model.
http://127.0.0.1:8069/web#cids=1&menu_id=176&action=276&model=purchase.order&view_type=listThe folder structure
Probably the easiest way to start designing this app is to make the folder structure.
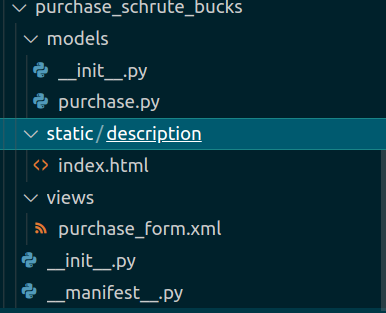
- The first files that need to exist in any module are the init and manifest files. The init file will tell the module which python files to use while the manifest file is one giant dictionary with information about how odoo will handle the module and give reference to any other files (xml and csv) that the module will need.
Because we'll be creating all of python files in a folder called models, all we need to do is just inherit everything everything from this folder. While it's possible to have all python files on the same level as the init file, odoo's documentation dictates that it is best practice include all of the python files in one subfolder.
__init__.py
from . import modelsAs mentioned, the manifest is a big dictionary to instruct odoo. Here we can specify a name, version, description, and author for this module that'll show up on the apps page. The depends key is a python list and used for any module that has resources that our module relies on and therefore must be loaded before the custom module is installed. In our case, we're saying that the purchase module must be installed first. The data key is a python list and will be used to specify any external files needed for the module such as views and security access files. In our module, our view that we're modifying needs to be specified. installable will dictate whether or not the user can install this from the apps page. Most of the time, this will be true. More values are available in the official documentation.
__manifest__.py
{
    'name': "Test Module",
    'version': "1.0",
    'author': 'Billy',
    'depends': ['purchase'],
    'data': ['views/purchase_form.xml'],
    'description': 'This is a test module',
    'installable': True
}- Model files. These are the python files that will contain all of the logic of our customization.
Because we're using the models subfolder as a python package to be used by the module, we need another init file. This file will be different because it will contain imports for all of the python files on the same level. In our case, we have one file purchase.py. Note that this file can be named foo.py if we wanted. The logic here is that
models/__init__.py
from . import purchaseThe python files specified in the models folder are typically the main logic for the app; in our case, adding one field. Below the code, I'll give an overview of what the code is doing.
models/purchase.py
from odoo import models, fields

class PurchaseOrder(models.Model):
    _inherit = "purchase.order"

    schrute_bucks = fields.Char(string='Price in Schrute Bucks', required=True)
from odoo import models, fields- These are typically the imports you need to use the odoo ORM.modelswill be used to define the class whilefieldis needed if you're creating a new field.class PurchaseOrder(models.Model):- All code modifying a model must be contained in a new class. Classes modifying the data schema will need to inheritmodels.Model. Convention dictates that the name of the class should be the name of the model with a capital letter for each dot separated part and no dot separation. For example, the modelpurchase.orderturns intoPurchaseOrder._inherit = "purchase.order"- Since we're adding fuctionality to an existing model, we'll tell odoo that we're going to inherit a model._inheritis a special variable that odoo recognizes as a precursor that the logic in this class will add functionality.schrute_bucks = fields.Char(string='Price in Schrute Bucks', required=True)- This is where we're actually defining the new field.fieldsis a special object in odoo that we'll use to add the field.stringis a parameter that will be the display name on the Odoo screen. Because we want this field to be required, we'll addedrequired=Trueas an indicator to odoo that this field must always be filled in when creating or updating a record in the database.
- View files. We want to add something to the screen that the user can interact with so we need a view. Like the model files, these don't need to be in a subfolder but the official documentation strongly advises this to organize your code.
Modification to views require us to put the new field next to an existing field. This is how odoo figures out where to put the field on the screen. This can be tricky for figure out a nearby find and take some trial and error. As with the models, I'll explain the code below.
views/purchase_form.xml
<?xml version="1.0" encoding="UTF-8"?>
<odoo>
    <record id="purchase_form_inherit" model="ir.ui.view">
        <field name="name">purchase.form.inherit</field>
        <field name="model">purchase.order</field>
        <field name="inherit_id" ref="purchase.purchase_order_form"/>
        <field name="arch" type="xml">
            <field name="partner_id" position="after">
                <field name="schrute_bucks" required="1"/>
            </field>
        </field>
    </record>
</odoo>
<?xml version="1.0" encoding="UTF-8"?>
<odoo>
<record></record>
<record></record>
...
</odoo>These tags are what odoo has built into the xml specification for defining view files. The <?xml?> and <odoo> tags only need to be defined once per view file. Inside of the <odoo> tag can be as many <record> tags as you'd like.
<record id="purchase_form_inherit" model="ir.ui.view">- The id attribute should be the underscore separated name of the record. The id should be unique for every record for all of odoo. The model attribute tells Odoo what type of record this is. All like records will have the same model attribute. For our needs, all views will have their.ui.viewvalue for the model attribute.- All
<record>tags will contain a number of<field>tags that tell odoo what the record is and how to process this. Inherit view records will always have the at least same four field tags: name, model, inherit_id, and arch
- All
<field name="name">purchase.form.inherit</field>- The value inside this tag will be the dot separated version of the record id. This will become the xml id that's used by the system. But as an example, you might want to inherit directly from this inherited view so you will use this xml id.<field name="model">purchase.order</field>- Not to be confused with the model attribute defined on the record above, this is the database model that this view is using. Remember in the url seeingmodel=purchase.order? However, this value is not only displayed in the url, it must be an existing database model.<field name="inherit_id" ref="purchase.purchase_order_form"/>- Therefattribute refers to the model that you're inheriting. This is where you specify the xml id that you're inheriting from. The easiest way to find this is to use debug mode in Odoo and use the option "Edit View"
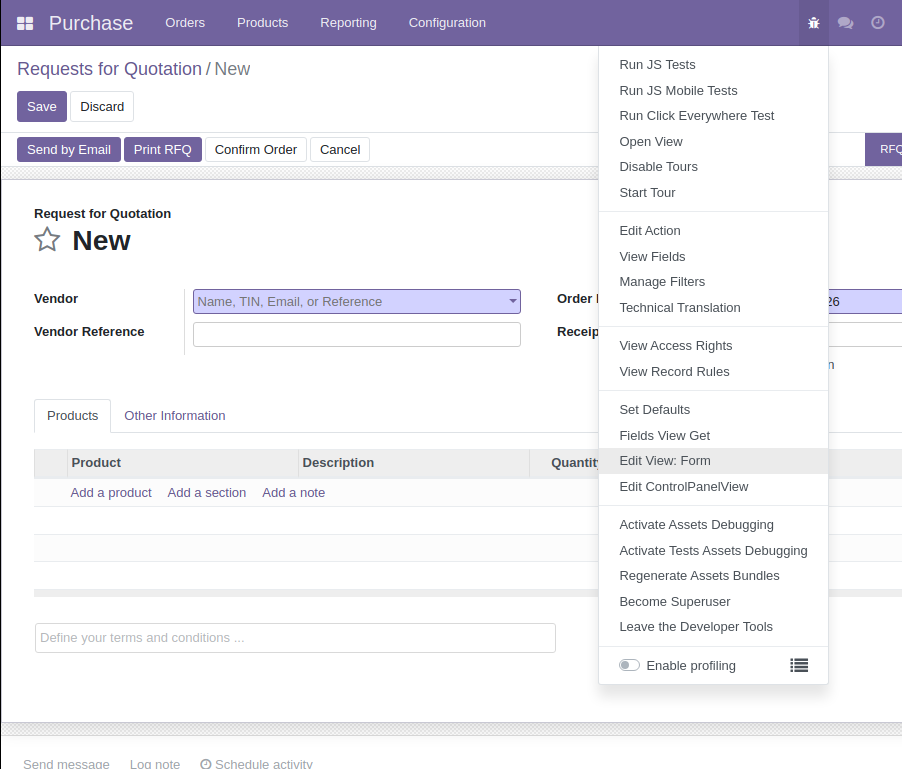

External ID is where you'll find the xml id. Notice that this is pre-pended with purchase., this tells odoo to look in the purchase module.
<field name="arch" type="xml">- This is the tag you'll use to specify where any xml data you're editing will appear.
Last but not least,
<field name="partner_id" position="after">
    <field name="schrute_bucks" required="1"/>
</field>
The above xml is contained within arch. We've decided that our new field will appear right after the partner.
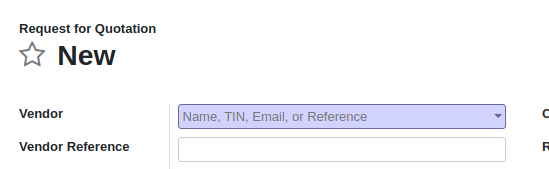
Because of this, we need to find, in Edit View: Form above, the technical name for the vendor field, partner_id.

We'll place the field after so we can define the value after for the position attribute. Inside of this field tag, we'll have what we want to appear in that position, the field. We want to specify the python variable name, which should be unique for the model <field name="schrute_bucks" required="1"/>. Notice that we've also specified the required attribute on the xml even though this is already specified in the python. The required attribute is more for best practices purposes. The general rule for this is that the xml can be changed with a studio customization without restarting the server while editing the backend requires restarting the server.
- Static Files. These files aren't necessary but provides useful information about the module that can be viewed if you click "More Info" on the apps page.
static/description/index.html
<section>
  This module exists solely for the purpose of making a unit test. It simply
  creates a text field and uses python to make sure that it is parsed as a
  number when it's created on the model
</section>
This is a good way to specify any installation instructions for your module.
Besides an index.html file, you can also specify an icon image file and declare in inside of your manifest file.
Installing the module
Once the module is written, make sure to add the location of your custom addons to the --addons-path command line parameter.
Once this is done, restart your odoo service and navigate to your Apps. You may first need to click the menu item for "Update Apps List" (you'll need to be in developer mode to see this option).

Once the apps list is refreshed, you should see your new module that you can install
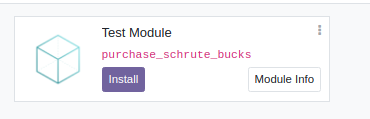
After clicking install, the module will load and then you should be taken back to the home screen.
The result
Now, the result of the module should be present. If we try to make a new purchase order, we should see our new field.
